Xerox
Xerox Versant 2100, 3100, 80, 180 Genuine IBT Transfer Belt Cleaner 042K94700 641S01070
- SKU:
- 042K94700, 641S01070
- MPN:
- 042K94700 641S01070
- Condition:
- New
- Availability:
- Usually Ships Same Day
- Weight:
- 3.5 KGS
Description
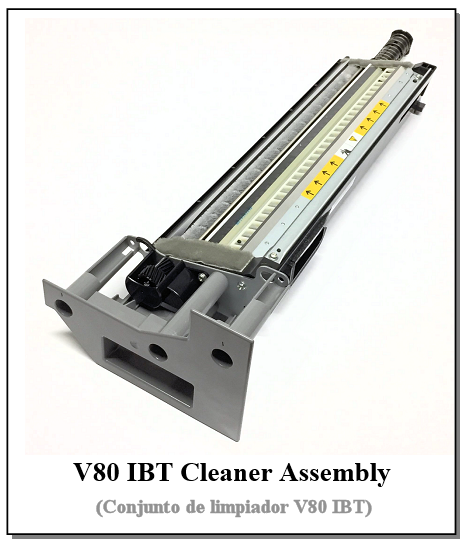
Xerox Versant 2100, 3100, 80, 180 Genuine IBT Transfer Belt Cleaner 042K94700, 641S01070
V80 style - IBT Cleaning Assembly Rebuild Instructions
Repair or Rebuild your Versant® V80/V2100 IBT Cleaning Assembly
| Technical Specifications |
|---|
|
V80 / V2100 IBT Cleaning Assembly Rebuild Instructions Repairing and rebuilding the Transfer Belt Cleaners for the V80, V180, V2100, & V3100
Continuing along the lines of going Green, saving some green and keeping stuff out of landfills, lets see what can we fix this month? A few months back we rebuilt the Heat Belt Units… charming buggers. Now let’s have a look at the Cleaning Assemblies come apart. These are really easy to rebuild. I think you’re doing to love them!
The IBT (Transfer Belt) Cleaning Assemblies sell under the part number 042k94700. They retail for around £300.- at last check (July 2019). Xerox does offer their own factory rebuilt units (part number 641S01070) but those are not always available.
The IBT Cleaning Blade is the main component which wears out. They do spare it (033K98760). You can save some good money if you choose to replace just the IBT Cleaning Blade (V80IBTCB). Even better, if you also replace the Cleaning Brush at the same time, the new blade will last quite a bit longer. The other piece which is available; the mylar Seal Blade, should only be replaced if it’s damaged (kinked, curled or otherwise deformed). You can pick up a Rebuild Kit (V80IBTCK) which includes all three pieces.
Replacing the Cleaning Assembly is quite simple with only two screws needing to be removed from the front end so it will slide out. Naturally, it’s likely to drop toner during removal, so make sure you put down a drop-cloth of some sort.
Next to the rebuild procedure. You’ll want to be very gentle when vacuuming the waste toner out of the unit, especially if the Seal Blade is in good condition. You’ll want to use a 5.5 mm Nut Driver for most of the screws although on the units I’ve seen a #2 Philips head driver will suffice.
Now to it! Here’s the Rebuild Procedure. Nice and simple:
PROCEDURE:
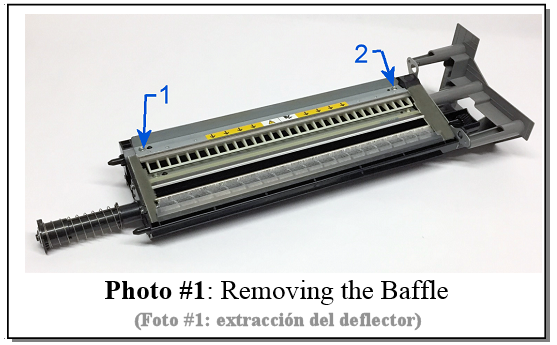
1. Start by removing the Baffle (2 screws, see Photo #1). Be careful when handling this piece as the metal blade on it is extremely sharp.
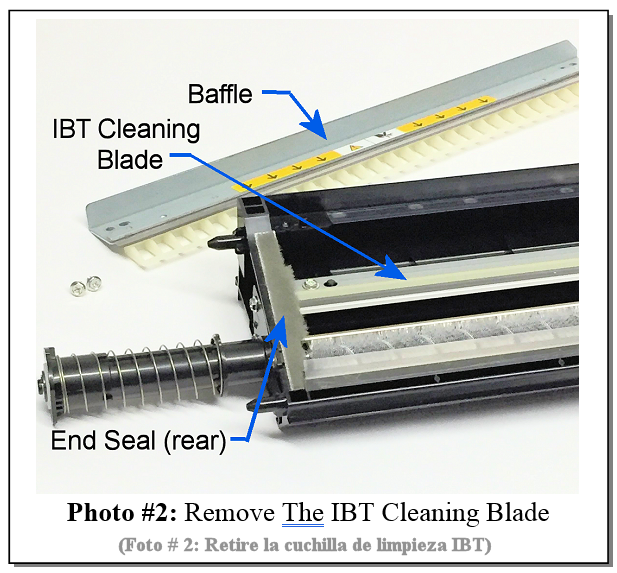
2. Next remove the IBT Cleaning Blade (2 screws). (Photo #2)
3. Gently vacuum up waste toner in the auger area and inside the spring-loaded Shutter and tube at the rear of the unit. Be extra careful not to hurt the mylar Seal Blade.
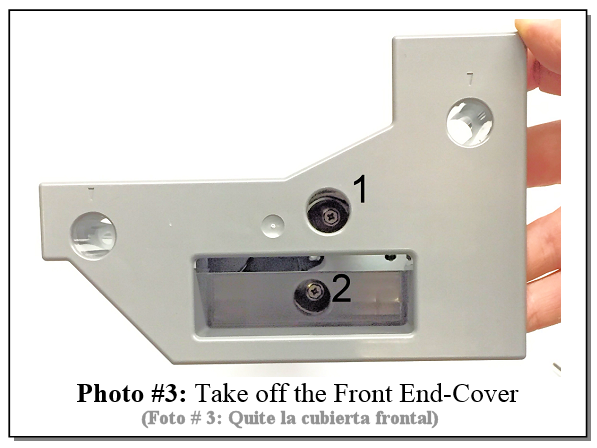
4. Now go at the front end and take off the Front End-Cover (2 screws) (see Photo #3)
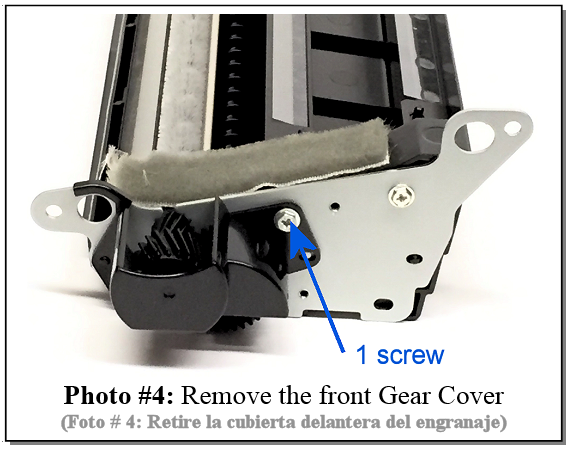
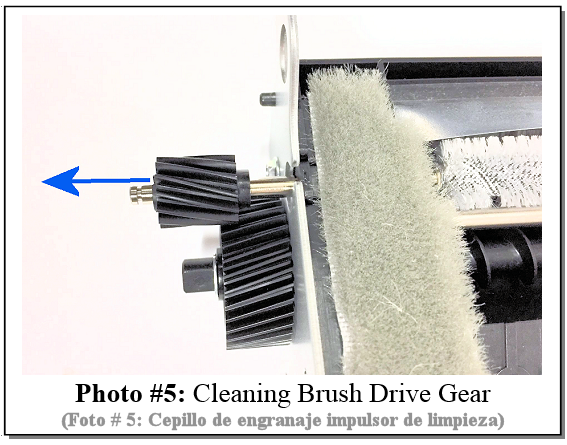
5. Next take off the black Gear-Cover (1 screw) (Photo #4), and slide the Cleaning Brush’s gear off (see Photo #5 for orientation of the gear).
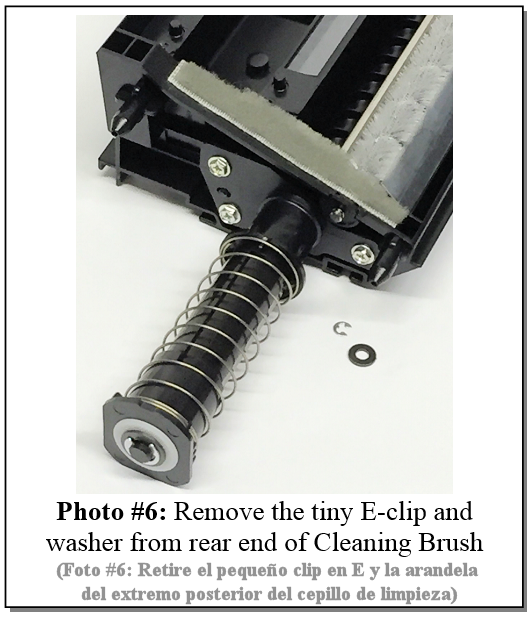
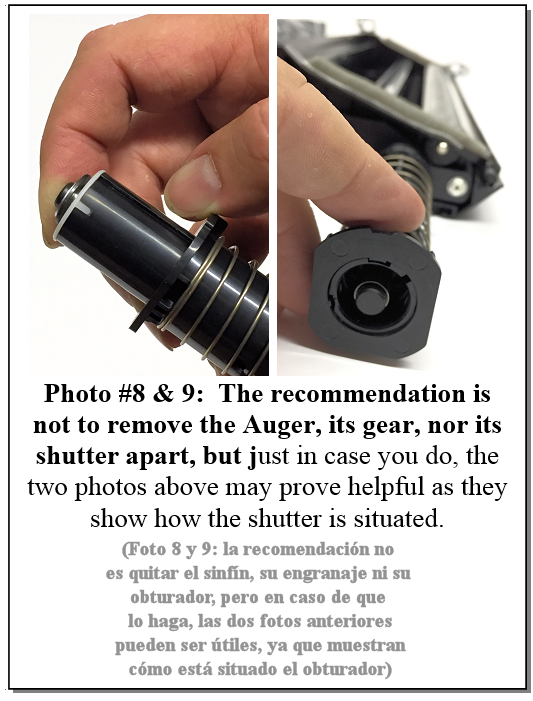
Tip #1: Best to leave the Auger’s Gear, Auger, and the Shutter and in place. It is tricky to re-seat both ends of the auger and the Shutter properly. Check the feel of the rotation of the auger before and after… if it feels stiff to turn, the auger isn’t seated right. 6. Now go to the rear end and remove the tiny E-clip and washer from the end of the Cleaning Brush. (Photo #6)
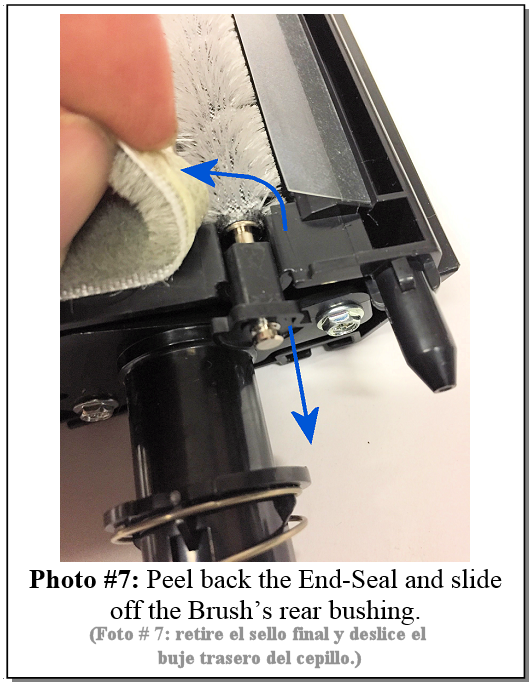
7. Peel the rear fuzzy End-Seal up carefully, far enough to release the Cleaning Brush. Then slide the Brush’s bushing to the rear and off (see Photo #7).
8. Remove the Cleaning Brush and replace it with a new one.
9. If the Mylar Seal Blade has any kinks or curling going on, replace it. Check the positioning of the new Seal Blade against where the original one lines up first. Then, peel off the old one and clean under it thoroughly (do not leave any adhesive behind). Start at one end and slowly lay the new blade’s peel and stick adhesive evenly and slowly to make sure it remains straight. Do not stretch the new Seal Blade or it will come out wavy.
10. Clean everything good and reassemble it all.
|
| Information Reference |
|
Written by our own Britt Horvat and first published in the wonderful ENX Magazine (www.enxmag.com) |


